Skip to main content Skip to search Skip to main navigation

WinClip MULTI - The new generation of window protection

Discover the ultimate WinClip window protection against insects, sun and pollen! 

Are you looking for a quick and easy window screen? Then you've found it with the WinClip MULTI:

✅ Fits your windows perfectly

✅ Ingeniously simple installation -> no DIY skills required!

✅ Ideal protection against insects, sun, and pollen

If you have wooden windows and/or flush-fitting windows, then you’ve come to the right place! That’s because we’ve specially invented and patented the ingenious WinClip MULTI for this purpose. The Multi window protection always fits, as it sits on the outside of the window frame. It requires only a small gap (min. 8mm) from roller shutters, making it a true all-rounder.

If you have offset plastic windows, there’s the WinClip STYLE. You can find it here.

-

-

-

If you have any questions, just send us photos of your window via WhatsApp. We’d be happy to offer you some advice—no strings attached.

>> WhatsApp to Windesa

The WinClip MULTI is available in a range of fabrics:

-> choose the WinClip that suits your needs:

Find the right WinClip window protection in just four steps:

1st step is the selection between the type of window
2nd Step is the selecton of fabric
3rd step is taling measures of the window
4th step is to enter the measures of the window

Step 1 ->

Select your window type here and choose between WinClip STYLE and WinClip MULTI (see description below).

Step 2 ->

Now select the right mesh for your application. We'll cover your WinClip with the protective mesh of your choice.

Step 3 ->

Measure the height and width of your window frame. You can find video instructions below and in the order form.

Step 4 ->

Enter the measurements into the configurator and your WinClip will be sent to you within a few days.

Do you need more information?

a flush plastic window

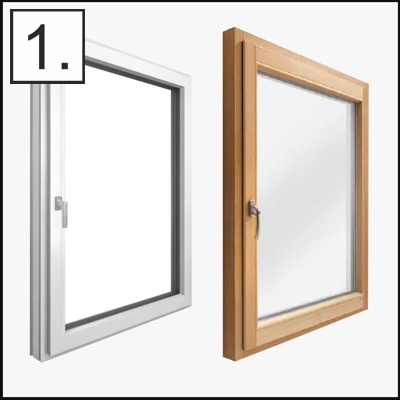
Which windows is the WinClip MULTI suitable for?

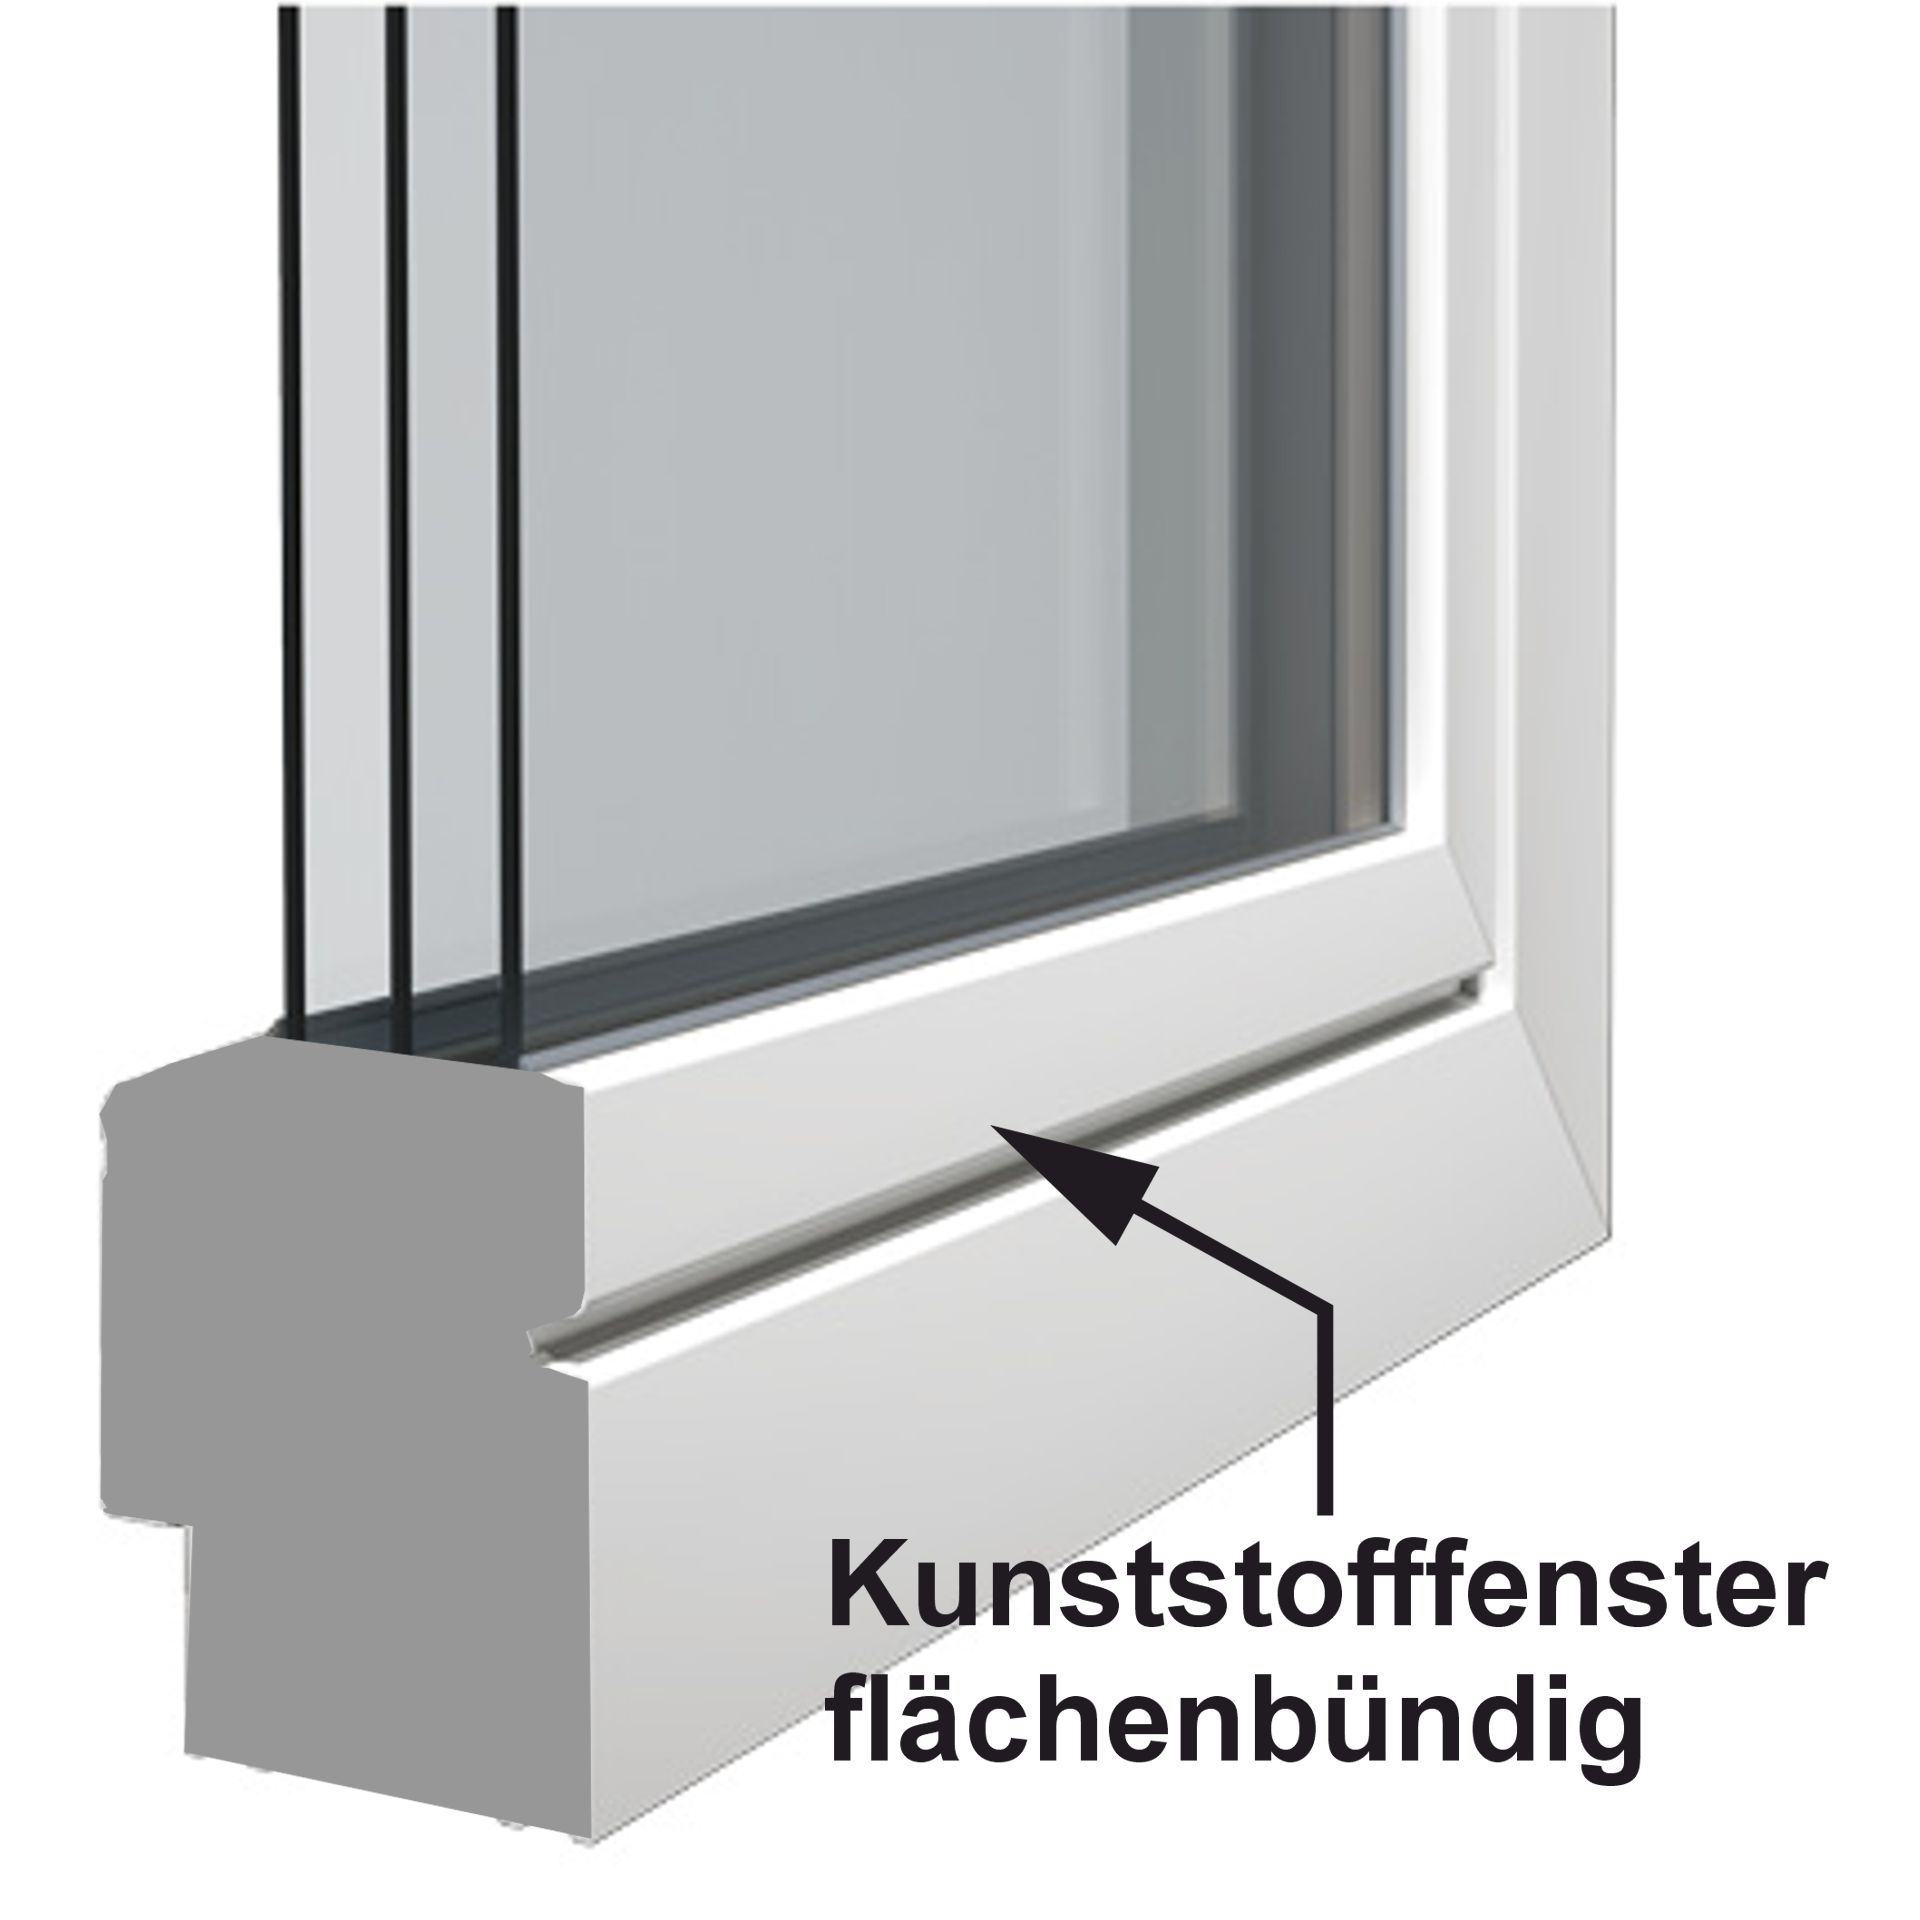
The WinClip Multi can be used with flush-fitting windows and/or wooden windows. in this picture, you can see an example of a flush-fitting window.

-

For offset PVC windows, we offer our equally ingenious WinClip STYLE:-

>>> to the WinClip STYLE

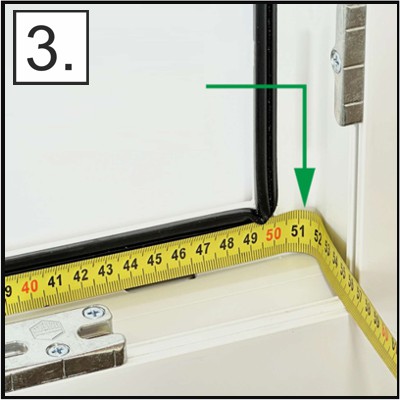
How do I measure the WinClip MULTI?

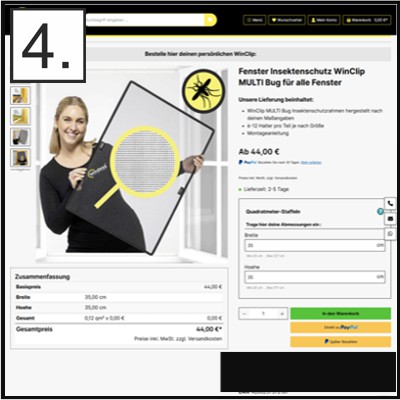
This video shows you how to measure the height and width of the window. You then enter these measurements into the configurator and add the item to your basket.

This ensures you receive a WinClip that fits perfectly, which we will manufacture and deliver within a few days.

-

>>> Measurement instructions

How do I install the WinClip MULTI?

Thanks to the patented WinClip mounting system, our WinClip stays firmly in place in the window frame even when the window is open and the wind is strong. This turns a strong draught into a pleasant flow of fresh air.

Due to this innovative system, installation is easy and requires no DIY skills. The video shows you just how quick it is.

-

>>> Installation instructions